I told dad the story and he said that a good compromise was to say "Hey, why don't we just leave it up for a week and if you still hate it I'll take it down." So I had that line stuck in my head, ready to whip out when the topic came up. But to my surprise, Nick just sorta didn't react to it! When he got back I pointed to the painting, and he said "Oh, you put it back up?' and I said "Yeah, I really like it!" and that was it! Muhaha, I will save dads advice for some other ugly thing I wanna put up later!

Anyways, I went online to try to figure out how to make this gallery wall. Research is key, and if you want to make your own gallery wall, I would suggest googling it and trying to find the ones you like and why. Some I find hideous. I mean, like, make me dizzy ugly! The other problem was that I didn't remember the term "gallery wall" and started looking up "collage wall" for a really long time. In the end I found a few that I really liked, and a ton of blogs that described exactly what I was going through. I decided to go for black frames since I had quite a few already, but no idea how to display them. I also had some wooden bulletin boards nick brought home from work for me and that's where the painting began.
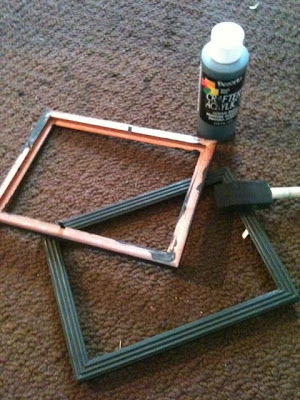
The first step was creating some consistency with my photos. Originally, a few frames were green, brown or wood colored. I'm sure some people might like the randomness of that, but I wanted consistancy. I went on an art attack and painted them all black with some acrylic paint. I'm pretty sure acrylic paint wasn't the best choice, and if I had any, I would have used latex. The acrylic doesn't really stick to varnished wood, although it worked out really well with the untreated wooden frames.
So there I was, 9:30 at night painting frames on my old rug that I don't mind getting paint on. It looked something like this.

After getting all the frames painted I went online and looked up an episode of the Maryiln Dennis show that I had caught only part of where they made a gallery wall. After 15 minutes of trying to get that to work with no success I found a blog that showed a much better easier solution.
(the original Marilyn Dennis show had the girl placing all her frames on a giant piece of art paper on the floor to decide the layout. I didn't have any giant pieces of paper, so I had to go the smaller route)
 (Sorry for the bad quality photo. It was taken with my iphone... not always the best shot. You might not be able to see that I labeled each piece of paper as well, so I knew what photo I'd be dealing with)
 (This is the hammer that smells bad. I know you know the kind. It's from the dollar store, but it smells like oil or some terrible plastic they wrap clothing in sometimes. Ugh. When this hammer isn't in use I put it on the deck. Bleck!)
Finally, my wall was finished. Nick came home from a business trip and said he enjoyed it but that it had too many clocks. (I know, its just one clock, but he just HATES clocks... the ticking drives him mad!) I'm going to say that means he loves it. I'm very happy with it, and am thinking I might add more. I have a few more frames laying around, but don't wanna make it too busy.

You might notice the letters on the bulletin boards. They don't exactly mean anything but I just love typography and thought the might spice things up. Right now they are tacked on but I'm planning on gluing them down. I'll still be able to tack things over them... but really, I just like the look of the bulletin boards, I don't really think they will be functional ones.

This is a far away shot. Looking at it now on my computer screen it looks a little bare, but in real life it seems so much fuller. I might add things, but I'm just worried about how carried away I'll get. (I tend to get carried away with a lot of things) Anyways, I would love to hear your comments!

Nice gallery wall Lyndsay. I like laying everything out on the floor and arranging it that way. Then transferring it up to the wall after trying different arrangements. New homes are lots of fun.
ReplyDelete